Zapier
Contents
Zapier is a product that allows you to automate your workflow by providing a connecting bridge between a variety of apps and services. If you have a Zapier account, you can integrate Screendoor with the apps your team uses regularly.
For example, the Citybase team onboards new employees with a Screendoor form. Once they have submitted their form, we use Zapier to post a welcome message to Slack:

Connecting Screendoor to Zapier
Before you get started, make sure you have permission to manage Screendoor’s API keys. Click on your avatar in the navigation bar, and select “Your organization” from the dropdown.
If you can see “Developer API” as an option in the sidebar, your first step is to create an API key with which Zapier can connect to Screendoor. Create an API key with a name of “Zapier,” and copy it.
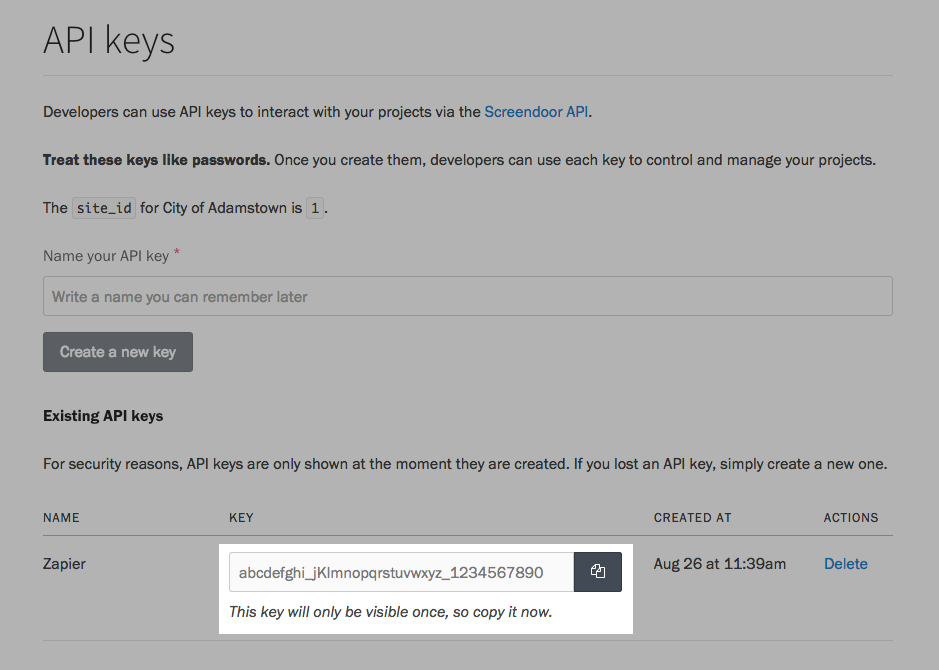
If you can’t find an API keys page on Screendoor, ask your account administrator to give you the proper permissions.
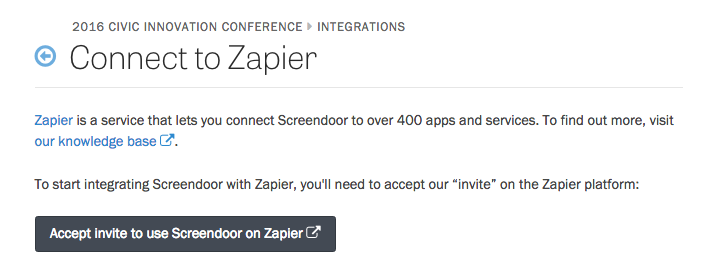
Because Screendoor is not publicly listed as a Zapier application, you’ll need to accept our invitation. Press the button below to do so.
Get invited to use Screendoor on Zapier
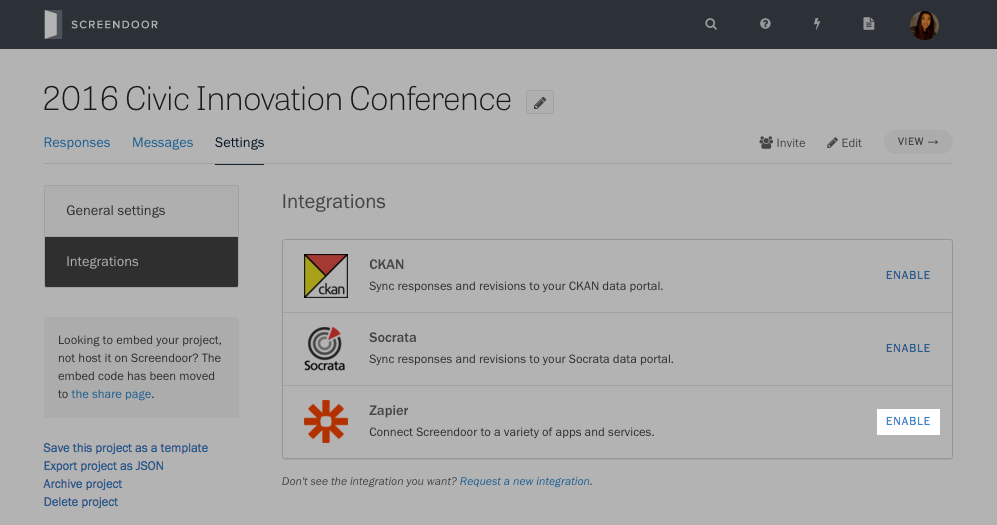
You can also accept our invite from within your project. Visit your project’s Settings page, select “Integrations” from the sidebar, and click “Enable” next to Zapier.
Then, click “Accept invite to use Screendoor on Zapier.”
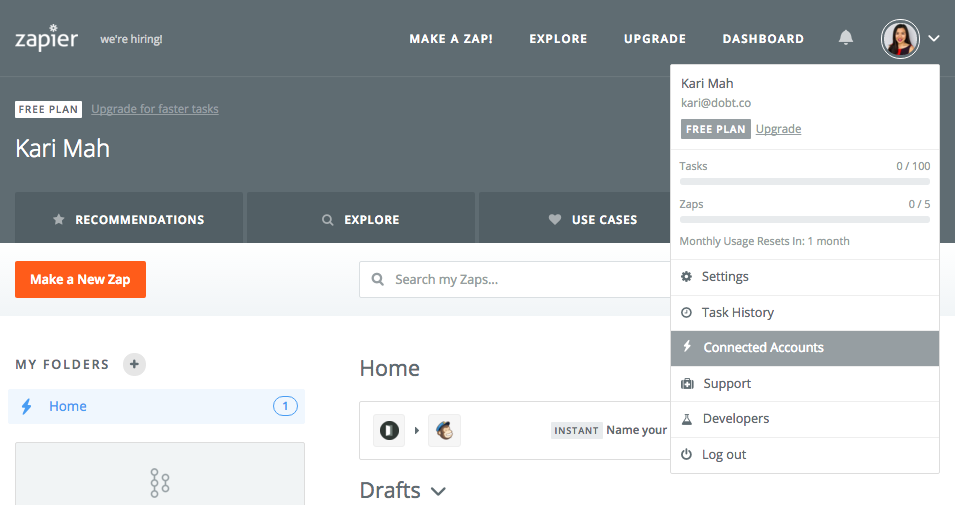
In Zapier, click on your avatar in the upper right corner, and select “Connected Accounts.”
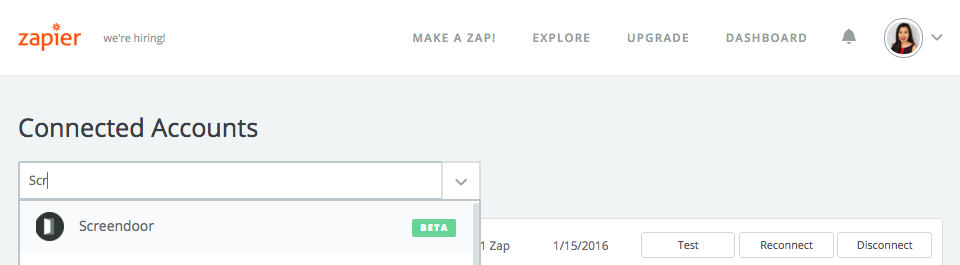
Click on dropdown and search for Screendoor. Click on “Screendoor” in your search results.
Under “API key,” paste in the key you generated earlier.
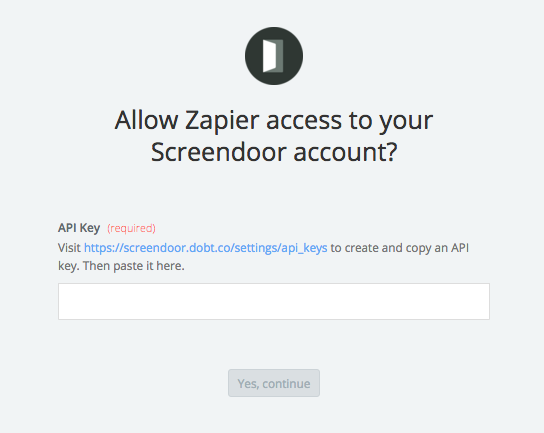
Zapier will test your API key to make sure it’s working. If you receive an authorization error, make sure you entered the API key correctly.
Once your API key is authorized, Screendoor will appear in the list of connected accounts.
Using Zapier with Screendoor
A “Zap” serves as the link between the apps you’ve connected to your Zapier account. It consists of one trigger and at least one action. A trigger is something that happens in an app that you want to be the start of a Zap’s workflow. An action is something your Zap does after a trigger occurs.
Screendoor currently supports three triggers and one action:
Supported triggers
Response received: Triggers when a response to your project is received.
Response updated: Triggers when a response to your project is updated.
Response deleted: Triggers when a response to your project is deleted.
Supported action
- Create response: Creates a new response.
Creating a Zap
To create a Zap, press the “Make a Zap” button on your Zapier dashboard. Here you’ll choose a trigger and add an action. Then, you’ll test your new Zap and turn it on. (Zapier provides a detailed overview of this process in their help documentation.)
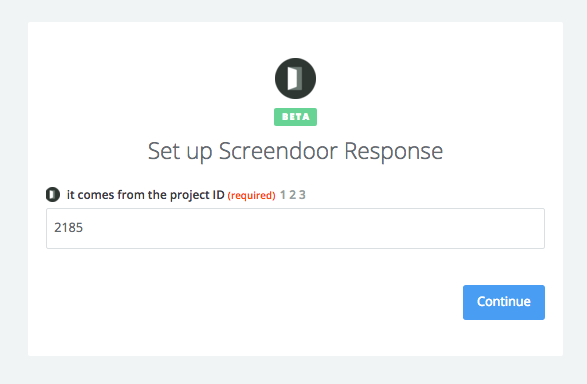
Whether a trigger or an action, any step that includes Screendoor needs to be connected to a specific project. Zapier will ask for your Screendoor project’s ID.
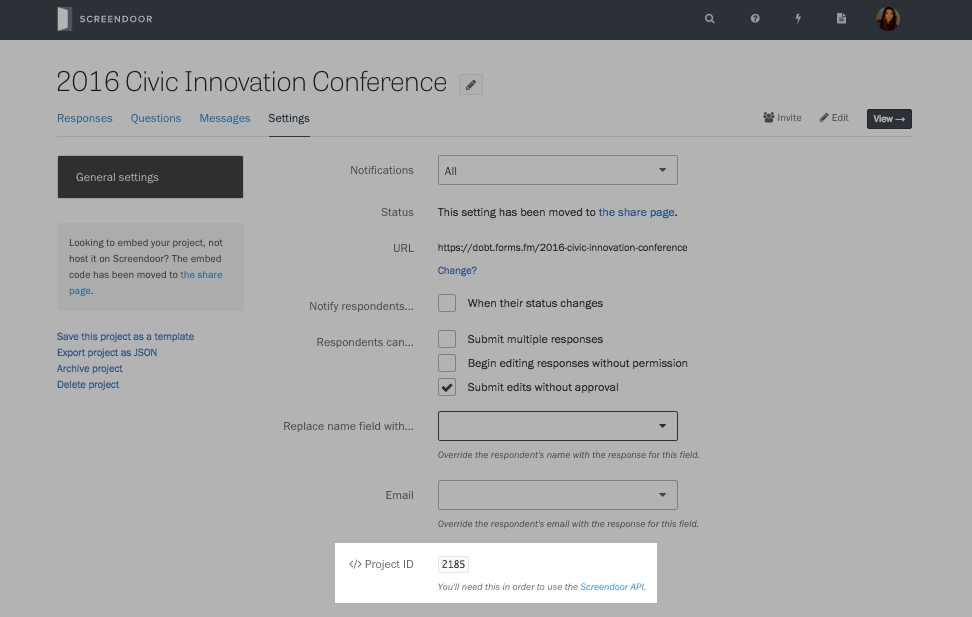
You can find the project’s ID on its Settings page, under “General settings.” Click the “Show advanced settings” link, and scroll to the bottom.
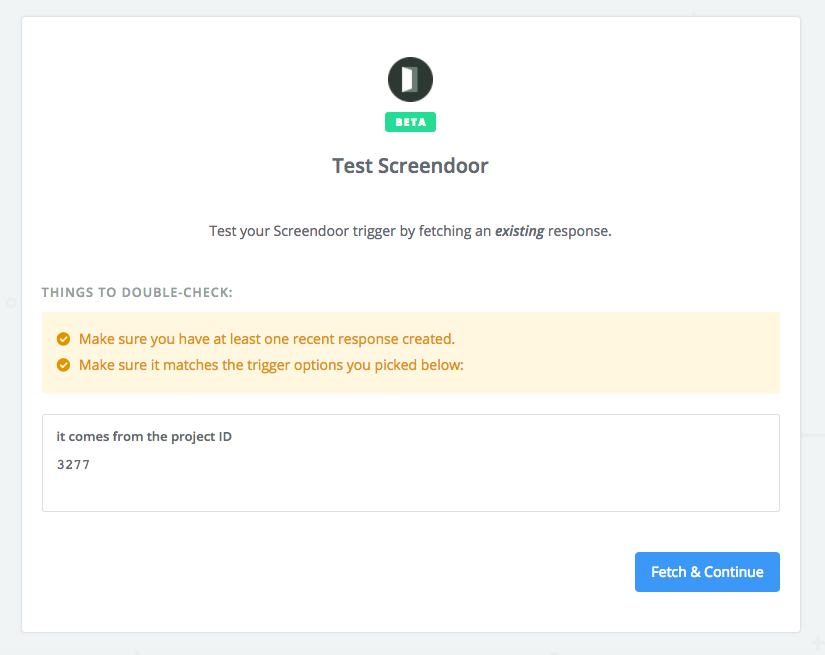
Once you add your project ID, Zapier will ask you to test the step. If the step is a trigger, Zapier will test it by fetching an existing response from your Screendoor project. Be sure the project contains at least one recently submitted response.
When you’re setting up an action step, Zapier will ask you to edit the “action template,” comprised of various fields you can populate with values from a Screendoor response. (Some of these fields will be required; some will be optional.)
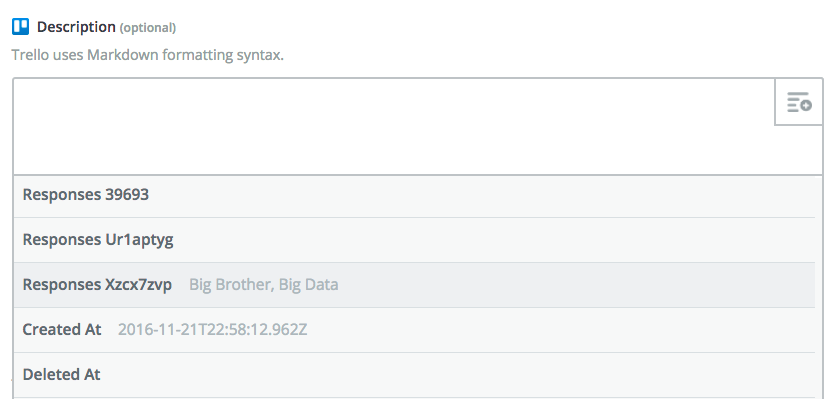
Press the “+” icon next to an action field to see a dropdown of fields from your Screendoor project. Many of the fields will be named “Responses” followed by an alphanumeric, e.g., “Responses xzcx7zvp.” Next to the name of the field, you’ll find a sample value that gives you a hint of what information the field collects.
If the dropdown doesn’t contain the Screendoor project field you’re looking for, retest the step that connects to Screendoor. Then, check the dropdown again.
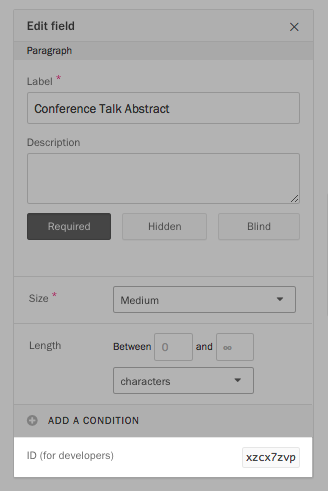
If you cannot identify the field by the sample value, return to the form builder in your Screendoor project and select your desired field. At the bottom of the “Edit field” menu, you’ll find the alphanumeric value under “ID (for developers).”
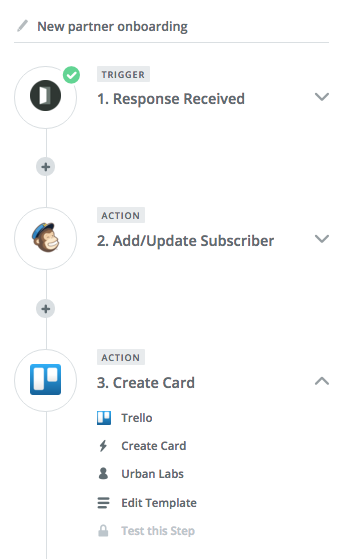
Configuring a multi-step Zap
Zapier now lets you automate multiple actions with a single Screendoor trigger. You can, for example, configure a Zap to add a respondent as a subscriber to your Mailchimp mailing list and create a card for their response in your Trello board. Read more about creating multi-step Zaps.